")
After going through your travel photos from your recent vacation, you can’t help but lament how much they pale in comparison to some of the shots that your favorite travel instagrammers snap.
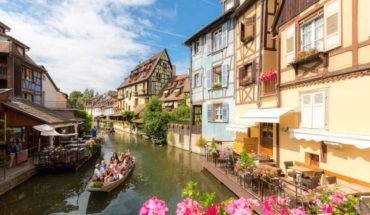
Want to know how to take great travel photography? This post will help you improve your form in three easy steps…
Get closer to your target
Think that you have taken a great picture, only to realize that everything looks way too small when editing it on your laptop?
If this has ever happened to you (and trust us, even photographic wizards have gone through this at one point in their careers), you’ll immediately understand the value of getting as close to your target as possible when shooting.
Doing so will allow more detail, texture and emotion to be captured. In some cases, getting up close and personal will not be possible for safety reasons – like at the zoo, or during African safaris.
In these instances, you’ll want to have a DLSR that supports attachable zoom lenses, as the digital zoom on phones and point and shoot cameras degrades image quality with every x1 magnification that you do.
Observe the rule of thirds religiously
In photography, keeping proportions in mind when composing a photograph is paramount when it comes to getting a killer shot.
All the awesome travel instagrams and professional photographers know about a little trick called the rule of thirds, which has the photog take all the relevant elements in a picture, and aligns them along a 3 x 3 grid.
Most great photo apps or decent cameras will have a grid setting that will make this task an easy one for the novice travel photographer.
In general, making your photos one third land and two thirds sky, and placing the primary photo subjects at intersecting points of the grid will result in pics that are far more captivating that anything that you’ve taken before.
Don’t be afraid to edit your photos – just take it easy on various settings
Ever taken a picture that came out too dark, overexposed, or just a tad crooked? Don’t despair, as modern photo editing software makes it all too easy to take a botched shot and turn it into something beautiful, or take a decent shot and turn it to a prize-winning pic.
As good as lightening shadows, toning down highlights and dialing up the color saturation will transform your shots, chances are, you will go overboard when starting out with editing software, so when editing photos the first few times, re-visit them and tone down your edits by about half.
This way, your pictures will look genuinely great, instead of like one of those overprocessed HDR shots that everybody moans and complains about.